The Digital Workshop blog has moved

8 Jun

Thanks for visiting the ship’s website!  We haven’t shut down our blog operations, but rather we have moved all of our efforts into one main blog.  This is to ensure that the experience for you, the guest, is one that is slightly easier because of more frequent posts, fresher content, and knowing that everything is in one great place.  The URL for the new website is:

http://haldigitalworkshop.wordpress.com/

At this site you’ll find new content, great feedback from all of our Techsperts, as well as useful links like Handout Downloads, and great information from Windows.

Thank you all for your support and for following along with the Digital Workshop.

Pocket “TRIPOD”

4 Jan

Do you hate carrying around a large tripod when you travel?

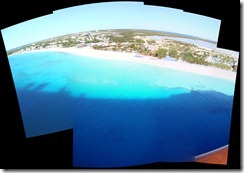
Do you try and take panoramic pictures but end up with a lot of wasted space? DSC05436 Stitch (2)

All you need is:

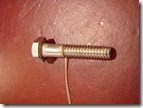
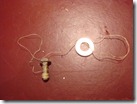
  1. 1/4"-20 screw(standard tripod size)
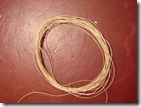
  2. length of string 4-6 feet
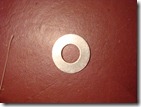
  3. One washer) size Options
  1. DSC05957
  2. DSC05960
  3. DSC05961


Attach the string to the screw and then to the washer.

DSC05969

When you are ready, attach the screw to your camera  bottom of your camera.

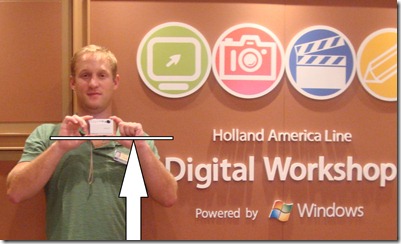
Step on the string and pull up, the string will keep your camera from drifting.

DSC06399


Aiden Dillon

Techspert WEDM-

What a “DAM” good Cruise

9 Dec

I just wanted to say thank you to everyone that attended any or all of the Digital Workshops this week. I hope that you picked up a a few items to show your Grandchildren a thing or two around the holidays.


Remember- How do we know that the picture is selected? IT’S BLUE!!!!!!


Aiden- WEDM

Ms Westerdam heads back to the Med!

8 Sep

After a tour of Norway and the U.K. the M.S. Westerdam heads back to the Mediterranean!

We have had some amazing photos taken by guests who love the Panoramic feature of Windows Live Photo Gallery!

Norway was beautiful and really gave our guests a great chance to get out and take some great Panoramas!

MS Westerdam Panoramic Photo Contest

8 May
 
 
We have had TONS of AMAZING panoramic photo entries!
I am so excited that so many guests have found this spectacular feature of
Windows Live Photo Gallery so useful!
Here are just a few of the dozens of entries!


I am going on vacation! Thanks for attending the Digital Workshop!

3 Apr

Hello all!

This will be my last blog entry as the Techspert on the ms Westerdam!  I am going on vacation tomorrow!

I wanted to express my gratitude to all those who attended the Digital Workshop here on the ms Westerdam!  I have really enjoyed meeting all of you.

It has been wonderful teaching the topics we cover here in the Digital Workshop including the Windows Live Essentials, Windows 7, and Windows Live Spaces! 

Next time you are cruising on the ms Westerdam, check out the Digital Workshop!  You will love all of the classes we offer!

Thanks again for all!  It has been a fantastic time here as the Techspert on the ms Westerdam.

Anna Laura

Taskbar customization with Windows 7!

29 Mar
Did you know that you can customize your taskbar with Windows 7?  Here’s what my Windows 7 taskbar currently looks like:
 
 
Each of the buttons on the taskbar represent a program that I can access with just one click.  You can customize your taskbar by pinning the programs that you would like to see there.  To pin a program to the taskbar:
 
  • Left click on the Start button in the bottom left-hand corner of your screen circled in red below:
 
 
In the Start Menu or under "All Programs," locate the program you wish to pin to your taskbar.  From this point, here are two ways to pin to your taskbar:
 
  • Right click on the program you wish to pin.  A menu will appear.  Left click on "Pin to Taskbar"

or

  • Left click and hold the left click on the program which you wish to pin.  While holding your left click, drag the program down on top of the taskbar.  When the program is hovering over the taskbar, release the left click. 

You can also rearrange the order of the buttons on the taskbar.  To do this:

  • Left click and hold the left click on the button you would like to move, then drag the button to where you would like to place it.  Release the left click to drop it there.

You can customize these buttons even more by accessing the Start Menu and Taskbar Properties window.  To access this window, right click on your taskbar.  Then, left click on Properties. 

The below menu will appear.  Customize your taskbar buttons further via the red circled option:


You can also put your taskbar on any side of your screen via the below red circled option in the same menu:

Great features of Windows 7 do not stop here!  Check out tons more at www.windows.com!

ms Westerdam Techspert,

Anna Laura

Pop Art your photos!

24 Mar
Hello all!
 
Part of the charm and beauty of Willemstad, Curaçao are its lovely, colorful buildings!  On my second trip there, I was so excited to capture a panoramic photo of these buildings…  However, the pictures that I took for the panoramic did not turn out as well as I had hoped!  Original panoramic:
 
 
I was able to save this photo by applying the Pop Art technique with the Windows Live Photo Gallery editing tools.  With Pop Art, I was able to make the buildings practically glow!  The result of Pop Art:
 
 
I applied the settings below with Windows Live Photo Gallery to get the Pop Art effect:


To create Pop Art within Windows Live Photo Gallery, apply the following to your photos:
 
Under Adjust color: 
 
  • Slide the Saturation bar all the way to the right.  You may adjust Color temperature and/or Tint as well.

Under Adjust exposure:

  • Slide the Brightness bar a little to the left
  • Slide the Contrast, Shadows, and Highlights bars all the way to the right.

You can always click on the  button to undo changes which you do not like.

Give Pop Art a try!

Windows Live Photo Gallery is a great program by Microsoft which you can download for free at download.live.com/photogallery!

Enjoy!

ms Westerdam Techspert,
 
Anna Laura


Try Shake! A fun feature of Windows 7 that will make you smile!

13 Mar
Hello all!
 
One of the best parts of my job here in the Digital Workship is introducing people to great features of Windows 7!  One feature that always makes people laugh is the Shake feature. 
 
Shake is an easy way to declutter your computer screen.  Let’s say that your computer screen has four windows open like in the picture below:
 

All you really want is to play Solitaire, and you would like the other three windows to go away…  Well, all you have to do is Shake the Solitaire game, and the other windows will disappear!  Here’s how you do it:

  • Left click and hold your left click on the Solitaire Title Bar (circled in red below) and shake the Solitaire window by shaking your cursor!


Watch how everything disappears but Solitaire!  That’s the fun part!

If you want those windows to reappear, just Shake the Solitaire window again!

Find out about lots of other fun features of Windows 7 by visiting the Windows.com website!

ms Westerdam Techspert,

Anna Laura

Panorama Photo Contest Winner!

7 Mar
Hello all!
 
This week, a panorama photo contest was held in the Digital Workshop!
 
Below is the stunning winning panorama photo of St. Maarten submitted by Joseph from Michigan: 
 
 
Beautifully stitched together with Windows Live Photo Gallery
 
ms Westerdam Techspert,
 
Anna Laura